A back tattoo gives you more room than nearly any other placement, but that freedom creates its own problem. It is easy to choose an impressive reference image and overlook how the design will sit between the shoulder blades, follow the spine, or narrow toward the waist. Bigger artwork is not automatically better artwork.
These 27 back tattoo ideas are organized by how much space they need. The first group suits the upper back and shoulders, the second explores vertical and mid-back compositions, and the final group is for someone ready to plan a larger statement. Each is a direction to develop with an artist, not a finished pattern to duplicate.
Plan the canvas before choosing an image
Start by deciding what part of the back you are actually willing to tattoo. A compact shoulder-blade piece can remain independent. A central spine design is more noticeable when the back is uncovered, but demands careful alignment. A full-back composition should be sketched as a whole even if it will be completed across several appointments. Movement, shoulder width, posture and existing tattoos can all affect the final layout.
Ask to see a full-scale stencil on your body, not just an attractive flat mockup. Look at it with your arms relaxed and lifted. Plan how clothes, training, work and ordinary sleep might affect the period immediately after each appointment. A skilled artist can explain which details need more size or contrast, without promising how any tattoo will heal.
Upper back and shoulder-blade tattoo ideas
1. A single eagle with open wings
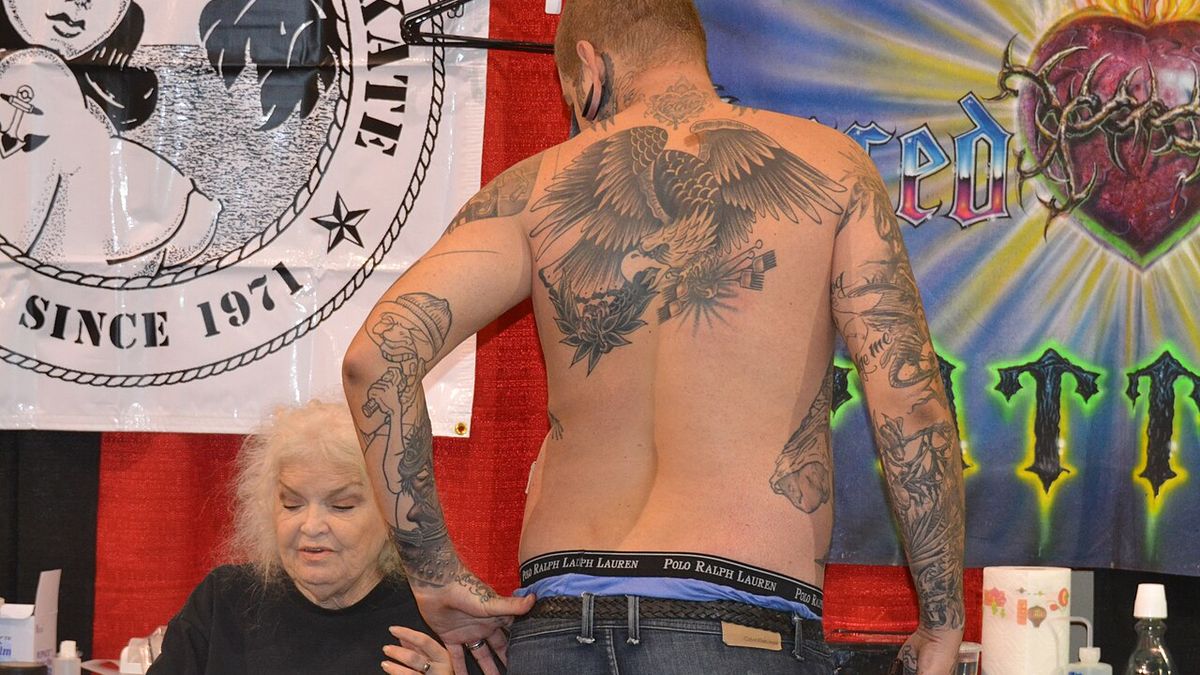
An eagle positioned high between the shoulder blades can use the natural width of the upper back without demanding a full piece. The important decision is whether the wings follow the shoulders or sit as a straight horizontal drawing. Feather detail needs adequate scale. If you prefer a clean result, let the silhouette lead and leave the smallest individual feathers understated.
The wingspan is the central design decision. A narrow eagle with steeply rising wings looks different from a broad bird stretching toward both shoulders, even if both use the same reference. Test whether the tips end naturally before the shoulder caps or seem abruptly cut off. For a smaller version, favor clear primary feathers and a strong head over tiny individual barbs. If future arm tattoos are possible, discuss how much visual space the wing tips should leave.

2. A minimalist mountain horizon
A simple ridge across the upper back can feel substantial without heavy shading. Choose a single recognizable contour rather than trying to reproduce every feature of a mountain photograph. The design can center just below the neckline or move toward one shoulder. Discuss how it will look when your shoulders round forward rather than judging it only while standing perfectly straight.
An uninterrupted mountain line often looks strongest when the peaks follow the shape of your upper back rather than being perfectly level. If you want a personal connection, simplify the profile of a place you have visited instead of reproducing a generic stock panorama. An open horizon below the ridge helps the design stay light. Ask to see the stencil while you turn your shoulders, since a line crossing too far onto the shoulder can change its apparent shape.
3. A blackwork sun above one shoulder blade
A restrained sun motif works best when the rays have deliberate spacing. Place it off-center if you want the other shoulder blade open for a future piece. You can use a mostly solid disc with a few sharp lines or a lighter ornamental treatment, but mixing both without a focal point can make the tattoo feel unfinished. Be prepared for the visibility when wearing a wide-neck top.
A circular sun is easy to draw on paper and harder to place on a back that curves and moves. Decide whether its center belongs directly on a shoulder blade or in the flatter area nearer the spine. A dark center with shorter rays feels heavier; an outlined center and broad open gaps can feel lighter. You can use a single ray as a directional accent without turning the piece into a large radiating pattern across your entire shoulder.
4. A detailed botanical branch
A branch can grow diagonally from the shoulder blade toward the shoulder, following the way your back moves. Choose leaves with a strong outline instead of compressing a complicated plant illustration into fine lines. The design may stay quiet in black ink or use restrained grey shading. Avoid assuming any plant has one fixed meaning across cultures and traditions.
Think about where the branch begins before deciding how many leaves it needs. A stem starting near the inner shoulder blade and extending toward the shoulder can look naturally grown, while the same branch reversed may appear to fall off the back. A few larger leaves are often easier to read than an abundance of small ones. Leave clean space near the neckline if you want the piece to remain hidden by a typical T-shirt.
5. A compass rose centered high on the back
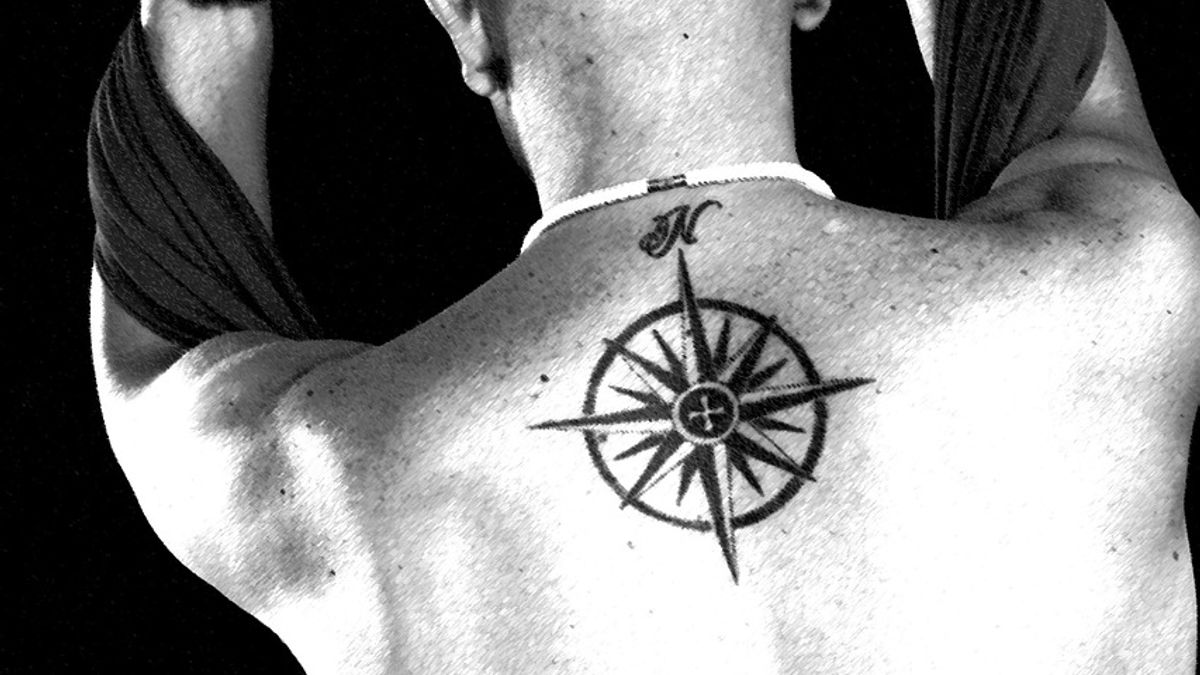
The flat visual field between the shoulders gives a compass room for symmetry, especially if it includes longer directional points. A restrained outer ring is often enough to define the composition. Double-check any meaningful coordinates or lettering before the stencil is approved. A compass that is small enough to hide under a collar may not have room for tiny labels.
A compass high on the back is a naturally centered subject, but perfect symmetry can make it feel rigid. Introduce a slightly textured outer ring or a subtle change in point lengths if the design needs character. A large reference image may include labels, degree markings and shading that will not translate to a compact piece. Start with a readable four-point shape and add only what helps identify the idea rather than explaining every direction.
6. A geometric fox or wolf silhouette
Faceted geometry can make an animal recognizable without copying a photographic portrait. Upper-back placement suits a broad, balanced silhouette, with negative space separating the planes. Decide which features must read immediately, such as ears or muzzle, then simplify secondary lines. The shape should remain clear when viewed from several feet away, not only in a close-up.
Try the animal design in silhouette first, then compare it with the finished polygon version. The ears, posture and face need to remain obvious when the internal geometry is ignored. A symmetrical frontal animal works well between the shoulders, while a profile can sit more comfortably on one side. If you want both shoulders eventually tattooed, a one-sided animal may be a more flexible starting point than a centered design that occupies all the important space.
7. An archway framing a landscape
An architectural arch above one shoulder blade can contain a mountain, moon, or single tree. Its frame gives the design a finished edge without requiring full-back coverage. Keep a clear distinction between the frame and the scene inside. Too many bricks, shadows and landscape details can compete in a small space, so choose one feature to attract the eye.
An arch can suggest a place without spelling it out. A narrow stairway, a distant tree or an empty doorway can carry the atmosphere while the frame gives the piece structure. Avoid adding an elaborate cityscape into an opening that is only a few inches tall. The arch could sit vertically on one shoulder blade or slightly closer to the spine, depending on the width of the image. Print it at actual size to assess the balance of the border.
8. A small traditional-style swallow
A swallow is a compact subject that can sit near the upper shoulder or the outside edge of the shoulder blade. Bold outlines and a confident wing shape give it character at a modest size. Work with an artist who understands the tradition behind the visual style rather than asking for a generic retro look. A pair can be balanced later, but there is no need to start with symmetry.
A swallow works well in a bold simplified style because the split tail and sweeping wings can carry the image. Rather than adding a full sky background, allow the bird’s silhouette to sit against open skin. If you choose two birds, consider making them respond to one another without forcing exact mirror copies. Their flight direction should lead the eye into the back rather than make both pieces appear to fly away from the body.
9. A modern abstract ink mark
A single curved mark or a short collection of brush-inspired shapes can work on an otherwise open back. The form should relate to the shoulder blade rather than look like an accidental streak. Ask for several stencil positions and inspect each while moving. Strong abstraction depends on control: its negative space, direction and endpoints should all appear intentional.
An abstract mark needs its own visual logic. One thick section and a tapering edge can create movement across the shoulder blade; several disconnected marks may need more spacing so they do not read as accidental smudges. Ask the artist to draw the concept at body scale before adding rough textures. A high-contrast abstract tattoo will look very different from the soft digital brush effects used in reference images. Judge the stencil without filters or dramatic photography.
Spine and mid-back tattoos built around vertical movement
10. A narrow sword following the spine
The spine provides a clear vertical reference for a sword or ceremonial blade. Centering the handle and tip matters more than filling the design with minute ornament. Avoid assuming the body is perfectly symmetrical or treating the spine as a perfectly straight ruler. Let the tattoo artist set the placement while you stand naturally, then check it in a mirror.
A centered sword can look strong when the handle aligns with the upper spine and the blade follows a deliberate vertical axis. The shape may need subtle adjustment for natural posture, especially if one shoulder sits differently from the other. Keep the guard simple if the sword is narrow. For a more illustrative version, a small botanical element can frame it, but the blade should still be the first thing someone notices.
11. A long botanical stem
A floral stem with spaced leaves can run down the central back without becoming a full floral panel. You might choose a species because it matters personally or simply because the form has a pleasing rhythm. One flower near the upper back and a gentle taper toward the waist can create balance. Leave enough skin between leaves for each element to remain distinct.
One curved stem can echo the line of the back without sitting directly on every vertebra. Decide whether the flower should face upward toward the neckline or sideways toward the shoulder. This changes the whole sense of movement. A large flower near the top and progressively smaller leaves beneath can make a clear hierarchy. Think ahead about where the stem finishes; a random fade above the waist can make the piece seem unfinished.
12. A line of meaningful symbols
Several small symbols can follow a central vertical axis if they have a genuine shared theme. Start with fewer than you think you need. Three clear marks often communicate more confidently than a dozen miniature icons. Check whether they should share one line weight and how much space each requires. Avoid adding symbols from religious or cultural traditions without understanding their significance.
If the design records important events, consider arranging the symbols by actual chronology rather than by whatever shapes fit most neatly. Choose a visual language that makes sense across all of them, such as bold line art or simplified black silhouettes. Enough spacing is essential for the series to read as individual decisions. The meaning can stay private, but symbols borrowed from a living religious or cultural tradition deserve accurate understanding and respect.
13. A central hourglass
An hourglass brings a natural upper and lower structure to the mid-back. The shape can be simple blackwork, engraved illustration, or detailed realism, but the sand and glass must remain readable at the intended size. If you add flowers, skulls or clocks, choose one supporting theme instead of creating an inventory of familiar tattoo symbols.
The hourglass is strongest when its outline is unmistakable before any decorative work appears. On a broader back, you can place the glass high enough to give the lower chamber room without extending into the waist. A few grains or a clear sand level are more readable than trying to illustrate hundreds of separate grains. If you add a time-related quote, test whether the lettering actually improves the image or simply makes an already familiar symbol busier.
14. A vertical forest silhouette
Tall trees naturally fit the long middle of the back. Use two or three layers with distinct levels of darkness if you want depth; too many closely packed trunks can become indistinguishable. This is a good choice for someone drawn to landscape imagery but not a panoramic scene. The artist should decide where the forest begins and ends rather than fading the bottom into accidental clutter.
Choose a real visual direction: a few tall pines against a pale sky, broad trunks forming a corridor, or a forest edge above a mountain ridge. Each tells a different story. A thick black foreground gives a narrow vertical design depth, but too much black along the spine can overwhelm the rest of the image. Try the composition at two heights. The shorter version may feel deliberate where the longer one begins to stretch.
15. A dragon moving diagonally across the back
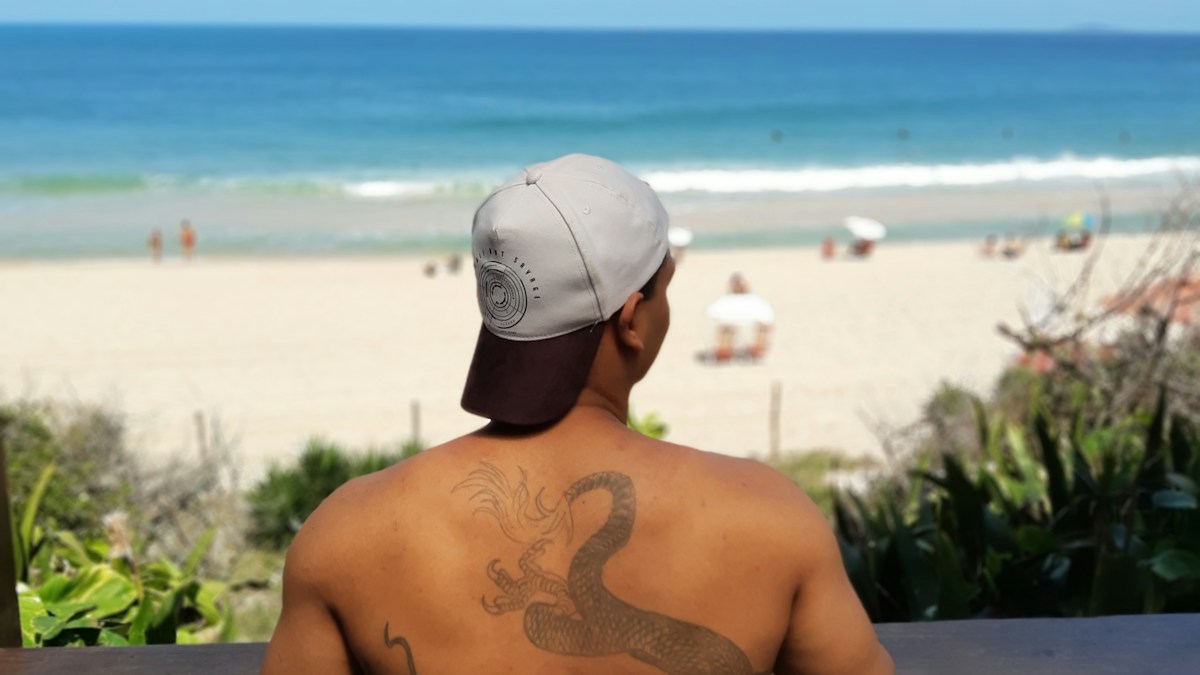
A dragon can occupy part of the mid-back while leaving room for future additions. The curvature of its body is more important than the number of scales. Decide whether you want a European fantasy dragon, a specific East Asian artistic tradition, or an original interpretation, and select an artist who understands the visual approach. Do not blend culturally meaningful forms casually.
A dragon’s head and body should have different jobs. Place the head where it can be recognized easily, then use the body to guide movement through the middle of the back. A diagonal curve often looks livelier than a straight upright pose. Discuss whether the creature’s limbs, wings or fins are essential for the artistic tradition chosen. Too many overlapping appendages can turn a dynamic creature into a tangle of dark marks.
16. A black and grey classical statue study
A section of classical sculpture, such as a face and one shoulder, gives a realistic artist room to work with light and shadow. The mid-back can support more facial detail than a tiny placement. Choose an image you have the right to adapt and be clear about which features matter. Fine stone cracks and faint background ornaments should not consume the piece’s visual contrast.
Photographs of statues often rely on studio lighting that will not exist on your skin. A tattoo artist must create the sense of carved stone using tones that remain separated. Choose a strong crop, perhaps a profile with a damaged shoulder, instead of copying the entire statue and pedestal. Bring the exact source reference and ask the artist to identify which shadows can be simplified. A convincing face matters more than small surface cracks.
17. A moon-phase composition
A sequence of moon shapes can create a rhythm down the back without relying on complex subject matter. Decide whether scientific accuracy matters or whether the phases are a decorative abstraction. Generous gaps prevent the circles from reading like one merged column. The line of moons can be centered or intentionally offset, but an accidental wobble will be easy to notice.
A scientifically accurate phase sequence may be more complex than the decorative arrangement you see online. Decide whether accuracy is part of its meaning. If so, verify the order and illumination rather than relying on a generic graphic. Keep the individual moons large enough that dark portions stay clearly distinct. The sequence could occupy a narrow strip near the spine or sit off-center, but check that the rhythm is intentional from top to bottom.
18. Wings spanning the upper back
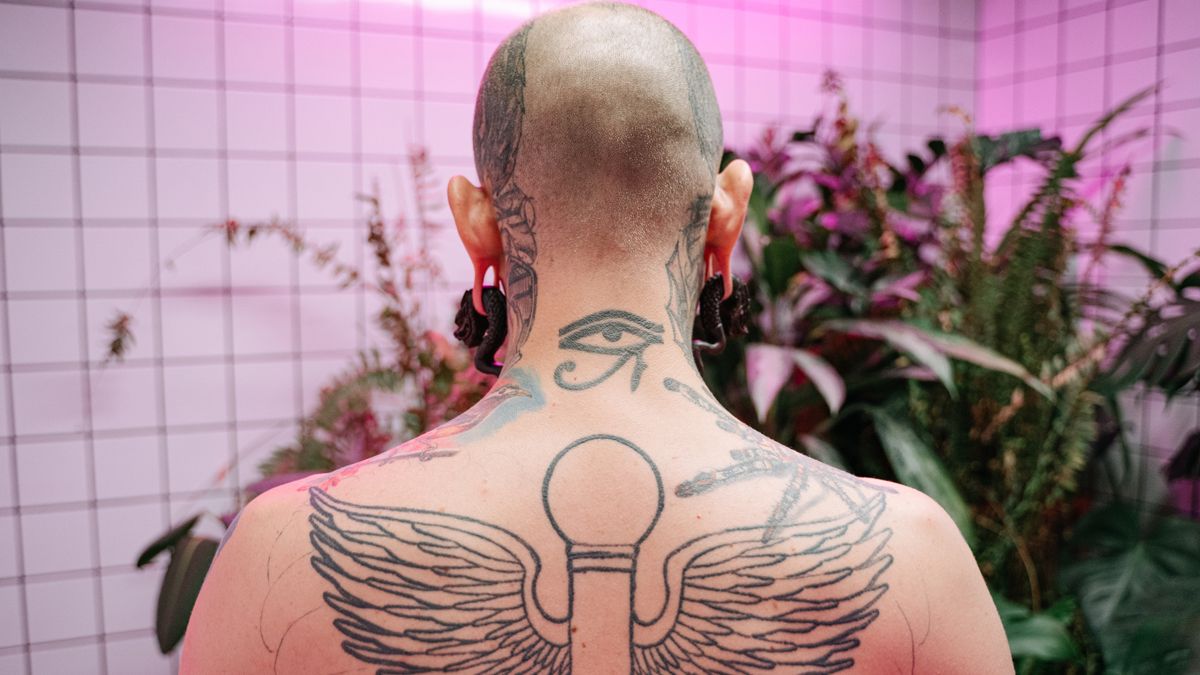
A pair of wings can make the shoulder blades part of the composition without committing to a full animal portrait. The feathers can begin near the spine and sweep outward toward the shoulders, or they can remain smaller and high on the back. Their direction matters: raised wings feel expansive, while folded wings produce a quieter, more compact design. Choose between realistic feathers and a simplified blackwork treatment early, because those options need different amounts of space.
An experienced artist should show the wings on the body in several positions, including relaxed and shoulders forward. You do not need tiny individual barbs on every feather; larger feather groups can provide a cleaner silhouette. Avoid making both sides look mathematically identical if the natural contour of your shoulders requires adjustment. If the motif carries spiritual or personal meaning, discuss that with your artist instead of adding background symbols automatically. The open area between the wings should remain intentional.
Large and full-back tattoo concepts
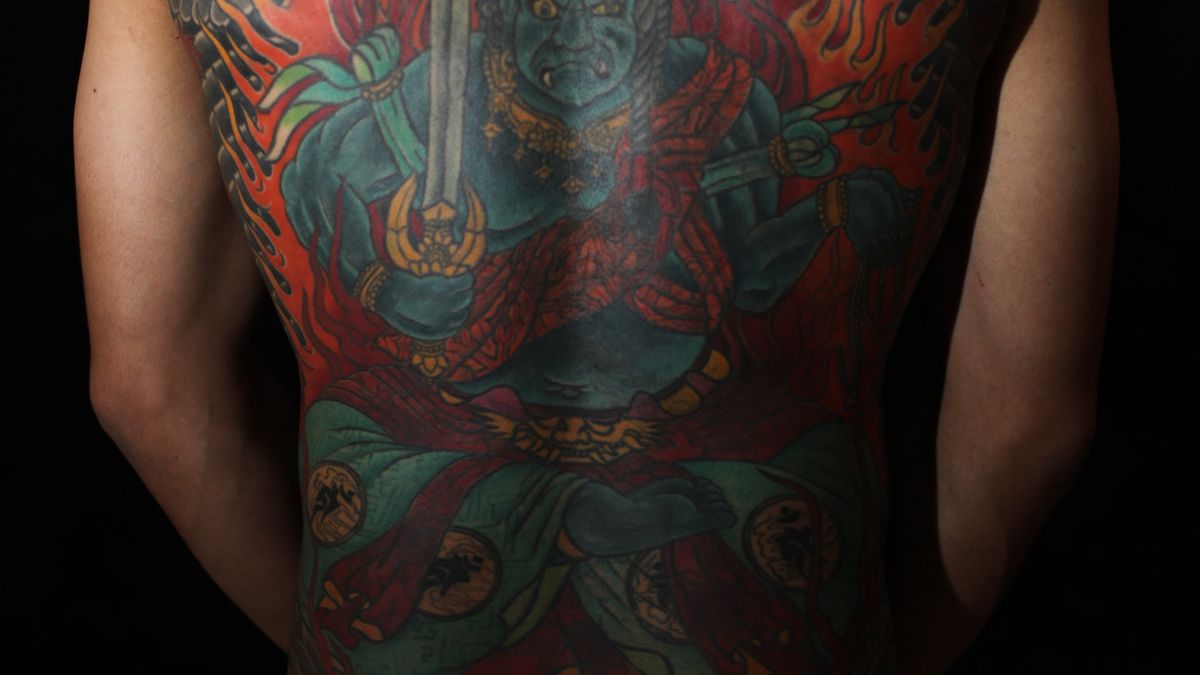
19. A Japanese-inspired full-back dragon
A dragon can anchor an ambitious back composition because its body can travel from shoulder to waist. Water, cloud or wind elements should connect the composition instead of becoming unrelated filler. Traditional Japanese tattooing is a distinct artistic discipline, so seek a practitioner who knows its visual conventions and symbolism. Plan the entire composition before booking the first large session.
Full-back Japanese tattooing calls for the whole composition to be planned at the beginning, including where the background finishes near the neck, sides and waist. The dragon may weave through waves or clouds, but the individual motifs need to relate to one another. Ask to see a full sketch rather than paying for disconnected sections one by one. This is particularly important because the largest dark areas become difficult to redesign once completed.
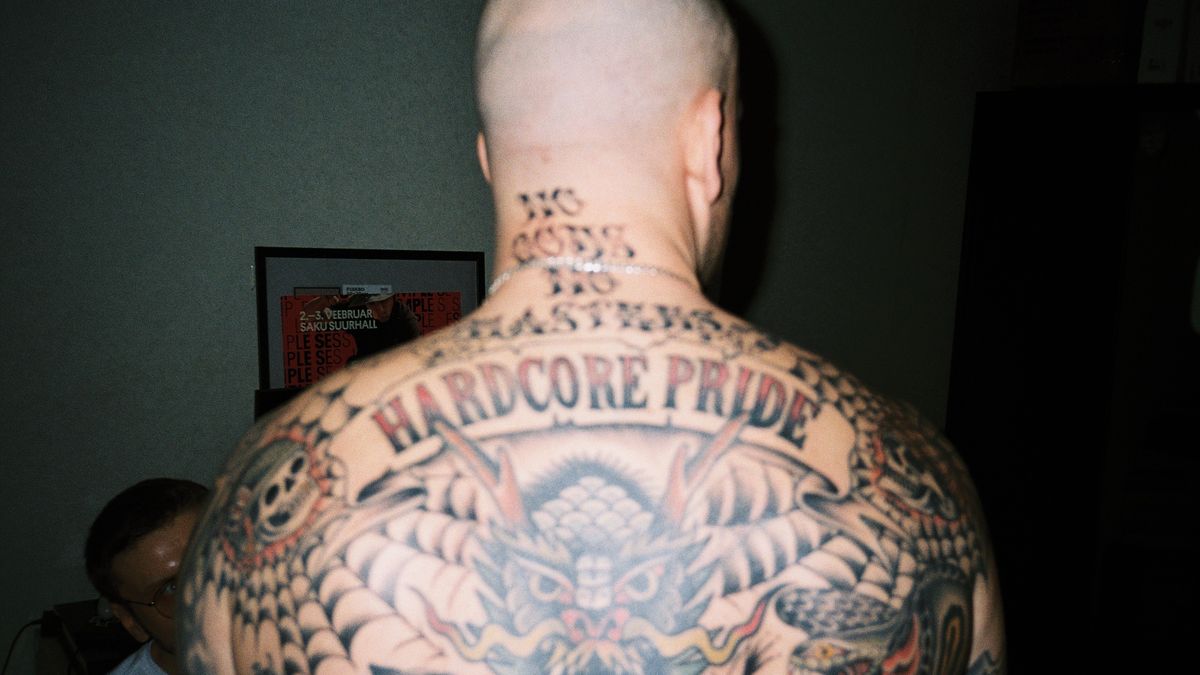
20. A black and grey tiger in a landscape
A tiger face can be the visual anchor, with vegetation or rocky terrain establishing scale around it. The main risk is making the background as dark and detailed as the animal, which removes its focal point. Ask the artist to prioritize the eyes, facial structure and major stripes. A realistic animal piece needs enough skin and an artist with convincing healed portrait work.
Give the tiger a clear relationship to the terrain. Is it emerging from foliage, resting on rock, or facing the viewer directly? A single pose is more convincing than combining multiple reference photographs with inconsistent lighting. A broad dark mane-like outline or heavy striped background can flatten the cat’s face. Ask the artist for a black and grey mockup without photographic enhancement and compare it with examples of healed animal pieces.
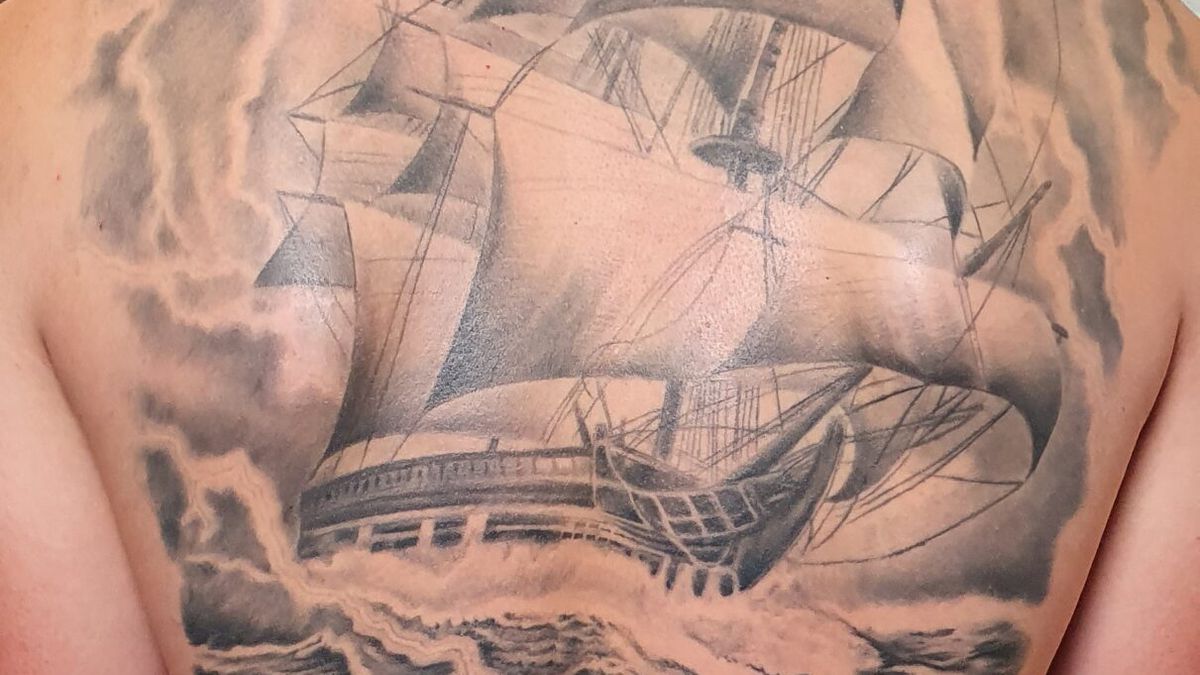
21. A stormy sea with a single ship
A ship surrounded by sea and sky can turn the back into a narrative scene. Establish the horizon first, then place the ship where its silhouette does not disappear into the waves. Avoid packing tiny rigging and windows into the same area as dark cloud shadows. Strong separation of light and dark gives the story a chance to remain legible.
The ship should remain recognizable before the weather is added. Establish a hull shape, one or two main masts, and a believable relationship to the sea. Then decide whether the background is stormy or calm. If both the ocean and sky are heavily shaded, leave a lighter separation around the rigging and sails. A full-back canvas permits detail, but that freedom should be used to create depth instead of filling every area.

22. A full-back tree with reaching branches
A tree offers a natural visual relationship between the waist, spine and shoulders. The trunk can rise from the lower back while the branches spread over the shoulder blades. The composition looks strongest when the branching pattern follows anatomy rather than covering the body with equal detail everywhere. Leave quiet patches of skin between major limbs.
The branching pattern offers a natural way to make the shoulders part of the design. Strong limbs can travel outward while smaller branches end before the arms. If the roots extend toward the waist, draw them as a planned base rather than loose decorative lines. An autumn tree with leaves and a bare tree produce very different visual density. Choose the version that fits how much open skin you want to preserve.
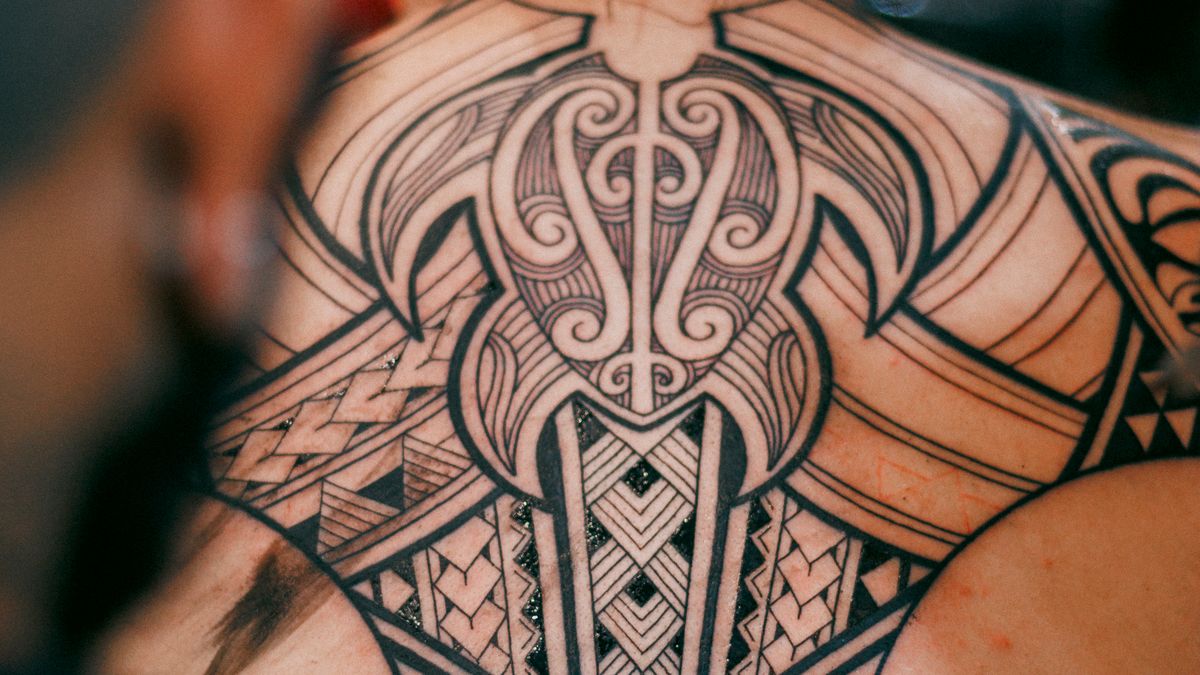
23. A large ornamental blackwork back piece
Ornamental blackwork uses repeated shapes, broad curves and structured dark areas to create impact without reproducing a realistic scene. A large pattern can start between the shoulder blades and move outward across the upper back. Decide whether symmetry or an intentionally asymmetric flow will suit your posture and existing tattoos. Strong black sections should be planned around open skin; simply adding more black will not improve readability.
Look at the pattern from several feet away. The central motif needs to read clearly before anyone notices the smaller details. Ask the artist to test the stencil with your shoulders relaxed, then rotated, since the pattern crosses curved anatomy. If the design draws on a named cultural tradition, research it rather than copying symbols without context. Precision and meaningful spacing are essential in large blackwork, so review photographs of healed work as carefully as photographs taken on tattoo day.
24. An engraved mythological scene
A mythological figure can become a substantial back piece if the central character is clear and supporting elements are limited. Choose the exact story or reference before gathering images, since details and symbols change between traditions. An engraved visual style can emphasize controlled lines and broad shadow blocks. The danger is trying to fit an entire story into a design with no hierarchy.
A strong mythology tattoo does not need every character from the story. Pick one decisive moment, then choose secondary symbols that make that moment understandable. An engraved or illustrated approach can provide continuity, but historical costume and objects need to match the chosen interpretation. If you want recognizable accuracy, ask a specialist in the subject or research the source before settling on a design. Avoid a collage of unrelated gods merely because the images look impressive together.
25. A full floral back composition
Large flowers and leaves can fill the back while following its natural taper. Give two or three major blooms priority, then use smaller forms to connect them instead of repeating flowers at equal scale. The result need not be delicate: heavy black outlines and generous negative space can make it graphic and powerful. Ask the artist to show how each edge finishes near the shoulders and waist.
Flowers on the back do not have to form a wall of identical blooms. Let the biggest flower occupy an area with enough room for its petals, and use smaller foliage to travel around the waist or shoulders. Vary the amount of shading so the eye can distinguish the main forms. If the tattoo may later extend to the ribs or arms, plan transitional leaves and open spaces from the beginning. A finished edge matters as much as the center.
26. A biomechanical full-back concept
Layered panels, joints and imagined machinery can make the back feel architectural. The effect depends on perspective and consistent logic: components should appear to continue through the shoulder blades and curve around the ribs. Random gears often look pasted on. Ask to see a coherent full-back sketch and check whether the artist has relevant healed work, not merely digital renders.
A biomechanical design becomes convincing when every component obeys the same imagined perspective. Decide which panels are lifted, what sits underneath them, and how the apparent machinery moves with the back. The shoulder blades can become major structural forms rather than problems to hide. Ask the artist to draw across the whole back and to show the shape without digital highlights. Realistic depth requires a careful balance of dark shading and uninked skin.
27. A cohesive patchwork back
Patchwork is not automatically a random arrangement of separate tattoos. It can work when you agree on a unifying line weight, palette, scale and spacing before adding pieces. Start with one central anchor and reserve areas for future additions so smaller designs do not become trapped filler. If your goal is eventually substantial coverage, plan the negative spaces as carefully as the tattoos themselves.
With a patchwork back, the largest piece usually deserves the best central position. Smaller work can then echo its contrast or line weight without copying its theme. Photograph the back straight on and sketch the future placements so gaps remain useful. A series of spontaneous additions may be meaningful individually, but they can block a future large design. Decide whether your final goal is open, gallery-like spacing or something approaching continuous coverage.
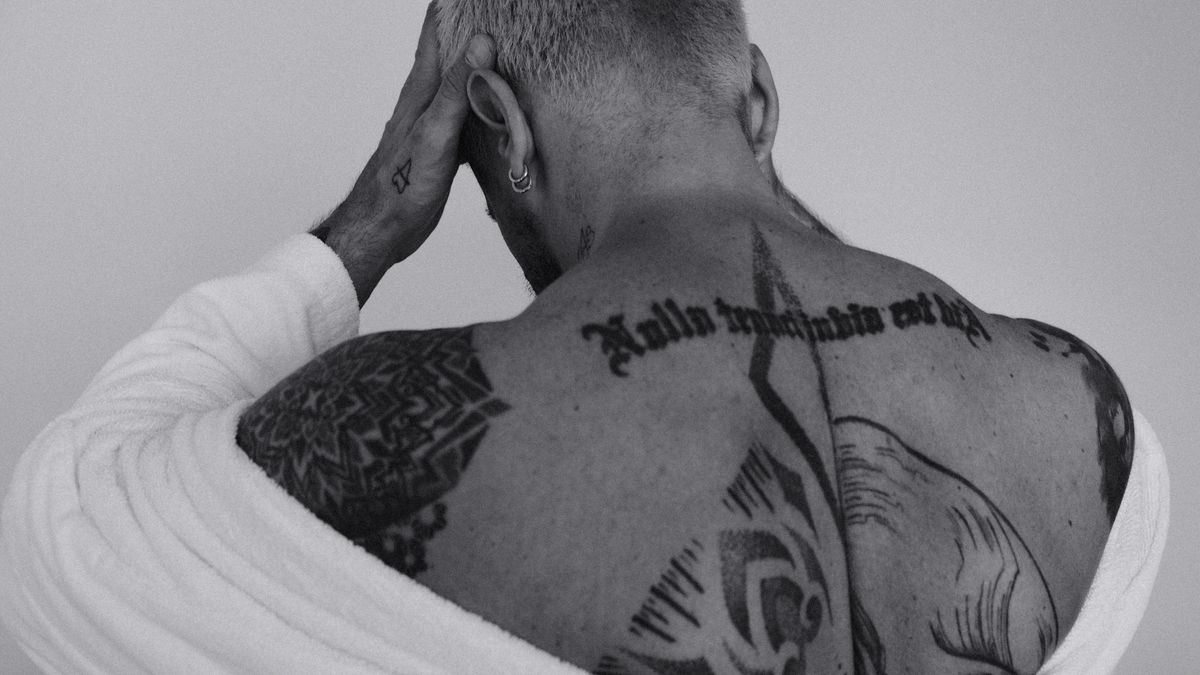
Which back tattoo size should you choose?
A small shoulder-blade piece gives you a contained commitment and keeps much of the back free. A central vertical design makes sense if the subject naturally follows the spine. A half-back concept can support a large portrait or detailed scene without extending everywhere. Full-back work is best treated as one composition, even when it requires several appointments. Choose the size that suits the actual drawing rather than shrinking it to an arbitrary budget.
| Placement | Best fit | What to check |
|---|---|---|
| Shoulder blade | One independent, compact piece | Leave room around it if you might add later work. |
| Central spine | Vertical symbols, botanical stems or narrow scenes | Check alignment with relaxed and raised arms. |
| Half-back | A portrait or scene that needs room but not full coverage | Plan edges and how the design narrows toward the waist. |
| Full-back | One coherent large composition completed over sessions | Ask for a full-scale plan before the first session. |
Ask about how the design interacts with existing scars or moles, and do not cover a changing skin lesion without medical assessment. Discuss whether the artist expects multiple sessions and how the studio schedules them. Costs and pain vary widely, so a quote for your design and a conversation about your own tolerance are more useful than a universal internet chart.
How to choose a tattoo artist for a large back piece
Different styles require different strengths. A traditional Japanese composition, a black and grey portrait and a precise geometric layout should not be treated as interchangeable specialties. Before committing, check:
- Healed portfolio examples in the exact style you want.
- A consultation that considers the design on your actual back.
- Clear studio hygiene and safe tattooing procedures.
- A plan for session breaks, staging and potential touch-ups.
- Written aftercare guidance and an opportunity to ask questions.
Choose an artist whose completed work and consultation process support the scale of your planned piece.
Healing, skin safety and long-term maintenance
A tattoo involves piercing the skin, and there can be infections, allergic reactions and other complications. The US FDA advises people to be alert for persistent rash, healing problems and fever, and to seek professional care when appropriate. A large back tattoo may be inconvenient to clean or observe by yourself. Arrange practical help for inspection if needed and follow the artist’s written aftercare instructions.
After the skin has healed, sun exposure can fade tattoo pigments. The American Academy of Dermatology recommends broad-spectrum, water-resistant SPF 30 or higher for tattooed skin exposed to sunlight. General skin care remains important, but it cannot replace proper care for a fresh tattoo or advice from a qualified professional. Our men’s grooming routine and skincare buying guide cover basic long-term skin care decisions.
Frequently Asked Questions
Should I start with a small back tattoo or a full-back plan?
If you may eventually want extensive coverage, plan the broad composition before placing an isolated tattoo. If you genuinely prefer one small design, it does not need a larger future role.
How long does a full-back tattoo take?
There is no single reliable number of sessions. Size, artistic style, complexity, the artist’s process and the way appointments are scheduled all affect the project. Ask for a personalized estimate.
Is the spine more painful than the shoulder blade?
Pain is subjective and can vary substantially with placement and personal tolerance. An artist can discuss what clients commonly report, but nobody can predict your experience precisely.
Can a back tattoo cover scars?
Some artists work around or over established scars, but not every scar or skin condition is suitable. Seek professional advice where needed, especially if the skin is changing or not fully healed.
Can I add to a back tattoo later?
Yes, but additions are easier when the original design leaves a clear direction, matching contrast and useful negative space. Show your artist the long-term goal from the beginning.
The bottom line
A back tattoo should be planned from the body’s shape outward. Pick the area you want to use, choose an artist who can handle the intended style, and protect the clarity of the main subject. A single shoulder piece can be as considered as a full-back project. The scale is your choice; coherent composition is the standard.
If you prefer a smaller canvas you can see every day, browse our 27 forearm tattoo ideas for men and compare how a design behaves on a different part of the body.